# Social APP

### **Create Facebook App ID and setup of user Login** <a href="#create-facebook-app-id-and-setup-of-user-login" id="create-facebook-app-id-and-setup-of-user-login"></a>

To use the FB plugin, you first have to create a new Facebook App with your Facebook developer portal at <https://developers.facebook.com/apps>.![](https://ionicfirebaseapp.gitbooks.io/ionicrestaurantapp/content/assets/image_14.png)

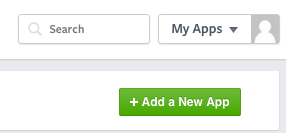
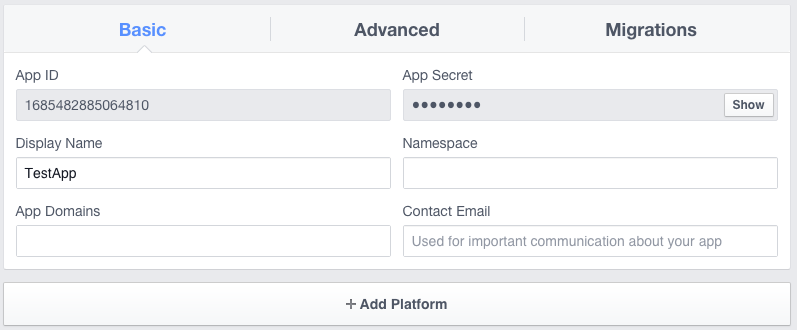
Retrieve the `App ID` and `App Name`![](https://ionicfirebaseapp.gitbooks.io/ionicrestaurantapp/content/assets/image_15.png)

Then type in the following command in your Terminal, where APP\_ID and APP\_NAME are the values from the Facebook Developer portal.

You can replace APP\_NAME and APP\_ID in config.xml file.

Now you'll need to add the native platforms you'll be using to your app in the Facebook Developer portal under your app's Settings:

![](https://ionicfirebaseapp.gitbooks.io/ionicrestaurantapp/content/assets/image_16.png)

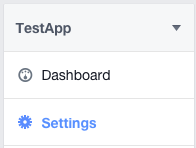
Click `'Add Platform'`.

![](https://ionicfirebaseapp.gitbooks.io/ionicrestaurantapp/content/assets/image_17.png)

Now you need to open your project's [`config.xml`](https://cordova.apache.org/docs/en/latest/config_ref/index.html)file, found in the root directory of your project.

\<widgetid="com.mycompany.testapp"version="0.0.1"xmlns"\[[http://www.w3.org/ns/widgets"xmlns:cdv="http://cordova.apache.org/ns/1.0"\&gt\](http://www.w3.org/ns/widgets"xmlns:cdv="http://cordova.apache.org/ns/1.0"\&gt](http://www.w3.org/ns/widgets%22xmlns:cdv=%22http:/cordova.apache.org/ns/1.0%22\&gt]\(http:/www.w3.org/ns/widgets%22xmlns:cdv=%22http:/cordova.apache.org/ns/1.0%22\&gt));

You need to copy your id , You are free to keep any id that unique.

**iOS Install**

Under 'Bundle ID', add the `id` from your `config.xml` file:

![](https://ionicfirebaseapp.gitbooks.io/ionicrestaurantapp/content/assets/image_18.png)

### Check`Single Sign On.` <a href="#checksingle-sign-on" id="checksingle-sign-on"></a>

**Android Install**

Add platform android

Set your Google Play Package Name. You can find your name in your platforms/android/AndroidManifest.xml file.

\<manifest android:hardwareAccelerated="true" android:versionCode="1" android:versionName="0.0.1" package="com.ionicframework.ionic2fblogin864493" xmlns:android="\[[http://schemas.android.com/apk/res/android"\&gt\](http://schemas.android.com/apk/res/android"\&gt](http://schemas.android.com/apk/res/android%22\&gt]\(http:/schemas.android.com/apk/res/android%22\&gt));

Check Single Sign On

```
Set the Class Name to com.facebook.FacebookActivity​Generate your own [Key Hash](https://ionicthemes.com/tutorials/about/ionic2-facebook-login).  please follow that tutorial how to create key Hash.
```

![](https://ionicfirebaseapp.gitbooks.io/ionicrestaurantapp/content/assets/image_19.png)

If you have follow all those setup properly, you will accomplish your mission :). \
You may also follow these article that might help you [ionic facebook native](https://ionicframework.com/docs/native/facebook/) and [ionic facebook native 2](https://ionicthemes.com/tutorials/about/ionic2-facebook-login).

### **Create Google App ID and setup of user Login** <a href="#create-google-app-id-and-setup-of-user-login" id="create-google-app-id-and-setup-of-user-login"></a>

Goto [https://console.developers.google.com](https://console.developers.google.com/).

Click on top Left dropdown button and it will popup window to Create a new app.![](https://blobscdn.gitbook.com/v0/b/gitbook-28427.appspot.com/o/assets%2F-LC49Fsrc7sj0vql2JSG%2F-LC8tJUMdYHs7JNTZDwf%2F-LC8tZ0Iljdo6jWV4uIM%2Fimage.png?alt=media\&token=737bba39-b5e4-4e60-8680-4e19bf0b78fd)

Click on Plus icon and create a new app.

Click on Left menu called Credentials > Create credentials and then select OAuth Client ID and then Select Application Type ( web application) , provide any name to app and it will generate Client ID and Secret KeyId.

![](https://blobscdn.gitbook.com/v0/b/gitbook-28427.appspot.com/o/assets%2F-LC49Fsrc7sj0vql2JSG%2F-LC8tJUMdYHs7JNTZDwf%2F-LC8taLrd4tGGzYMd_D-%2Fimage.png?alt=media\&token=fdee6ab6-62cc-4476-b83b-934c1577c7ae)

You need to add These Info into Google Firebase Setup and in Login.ts and Signup.ts you can replace webClientIdwith own clientID.

To integrate Native Google Plus Login you need to follow same as above but this time select Android platform and fill all the required Info. You need to create certificate signing request from the command provided there and add package name from Androidmanifest.xml files.![](https://blobscdn.gitbook.com/v0/b/gitbook-28427.appspot.com/o/assets%2F-LC49Fsrc7sj0vql2JSG%2F-LC8tJUMdYHs7JNTZDwf%2F-LC8tgJ0K6D3amWbV04l%2Fimage.png?alt=media\&token=ad01f46a-f429-45be-997f-5f9ae0a830a6)

​Similarly if you want google plus login for IOS you can select that option and provide the required details like bundle Id and all.

### **Create Twitter App ID and setup of user Login** <a href="#create-twitter-app-id-and-setup-of-user-login" id="create-twitter-app-id-and-setup-of-user-login"></a>

Go to [https://fabric.io](https://fabric.io/) and create account or Login.

Navigate to <https://fabric.io/kits/android/crashlytics/install> and click on Add your API key on right side.![](https://blobscdn.gitbook.com/v0/b/gitbook-28427.appspot.com/o/assets%2F-LC49Fsrc7sj0vql2JSG%2F-LC8s4tkTFnfVb-ipNfI%2F-LC8seSiAICzr2hpIQbj%2Fimage.png?alt=media\&token=9c7a43cd-fda4-42b1-8ded-2f62f93b0899)

Copy your API key and replace API of Config.xml FABRIC\_KEY.

![](https://blobscdn.gitbook.com/v0/b/gitbook-28427.appspot.com/o/assets%2F-LC49Fsrc7sj0vql2JSG%2F-LC8s4tkTFnfVb-ipNfI%2F-LC8sk3_bYlBSOdquK9i%2Fimage.png?alt=media\&token=37664596-d4e1-43fd-bcfa-ae437f16eaf4)

Now you need to goto [https://apps.twitter.com](https://apps.twitter.com/) and create a new app you need to enter value in all the required fields.

Click on Key and access token tab.

![](https://blobscdn.gitbook.com/v0/b/gitbook-28427.appspot.com/o/assets%2F-LC49Fsrc7sj0vql2JSG%2F-LC8s4tkTFnfVb-ipNfI%2F-LC8sreSuFkUQ3yH0M31%2Fimage.png?alt=media\&token=a838b5ae-1bd0-434f-bbf6-a53a349b3a04)

Copy that API key and API Secret key to your XML file. These 2 information also needed in your Firebase twitter setup.

Please be patience if you are looking to integrate Native social Login to your app. It take lots time sometime if you doing it First time need to spent a days on this as well. Cordova based normal social login is very easy but in that user need to login with there credential each time we open app in App browser but In case of Native it access info from user install app on device. In future if they make process simpler we will update our docs as well.

Once you setup native Module better Delete your old platform and install platform again so new platform will sink with your new config.xml file where you added all the social key stuff.
